From Cherry to Cup: How to Identify and Avoid Coffee Bean Defects That Affect Flavor
Behind every exceptional cup of coffee is a long, careful process — from farm to drying yard, from storage to roastery. But even the best beans can be compromised by defects that develop along the way. These flaws, often invisible to the casual drinker, can have a major impact on the flavor, aroma, and quality perception of the brew.
In this article, you’ll learn to identify the most common coffee bean defects, how they affect sensory experience, and how roasters, producers, and baristas can minimize their impact.
What Are Coffee Bean Defects?
A coffee defect is any irregularity or damage in a coffee bean that negatively affects its quality. Defects can occur at multiple stages of the coffee’s journey:
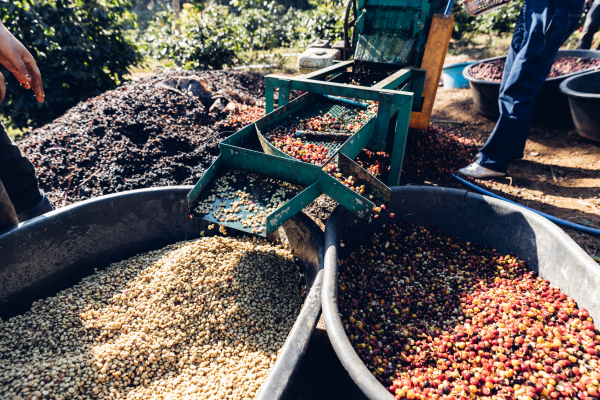
- During harvesting (e.g., picking unripe or overripe cherries)
- During processing (e.g., fermentation errors or drying inconsistencies)
- During storage (e.g., mold, insect damage)
- During roasting (e.g., scorching or tipping)
Coffee professionals often use a grading system to categorize defects into two groups:
- Primary defects: Major flaws like sour beans, mold, or foreign matter
- Secondary defects: Minor issues like broken beans, chips, or quakers
The SCA (Specialty Coffee Association) has strict limits on how many defects are allowed in high-grade coffee. A single primary defect can downgrade a sample significantly.
Why Defects Matter
Even a small number of defective beans in a batch can ruin the taste of the cup. Defects:
- Introduce off-flavors like sourness, astringency, or fermented notes
- Lower the overall quality score
- Impact roasting performance
- Damage a brand’s reputation for quality
For professionals and enthusiasts alike, knowing how to spot and avoid defects is essential for maintaining a high-quality coffee program.
Common Coffee Bean Defects and Their Sensory Impact
Let’s explore the most frequent defects found in green (unroasted) coffee and how they affect the cup:
1. Black Beans
- Appearance: Dark black or charcoal-colored beans, often shriveled
- Cause: Overfermentation, overly ripe cherries, or long delays in drying
- Flavor Impact: Strong bitterness, ash-like taste, dirty aftertaste
- Prevention: Timely harvesting and proper fermentation control
2. Sour Beans
- Appearance: Brownish beans with soft texture
- Cause: Fermentation gone wrong, often from cherries that were damaged or left in water too long
- Flavor Impact: Sharp sourness, acetic or vinegar-like notes
- Prevention: Monitoring fermentation time and hygiene during processing
3. Moldy Beans
- Appearance: White fuzz or musty smell
- Cause: Moisture trapped during drying or poor storage conditions
- Flavor Impact: Musty, earthy, moldy cup profile
- Prevention: Proper drying (to 11–12% moisture) and dry, ventilated storage
4. Insect-Damaged Beans
- Appearance: Small holes or tunnels in the bean
- Cause: Coffee borer beetle infestation (especially Hypothenemus hampei)
- Flavor Impact: Flat, woody taste; sometimes sour
- Prevention: Integrated pest management on the farm
5. Quakers
- Appearance: Pale, yellowish, lightweight beans
- Cause: Underripe cherries that didn’t fully develop
- Flavor Impact: Papery, peanut-like flavor; lowers sweetness
- Prevention: Sorting out unripe cherries during harvesting
6. Broken or Chipped Beans
- Appearance: Visibly cracked or fragmented
- Cause: Poor handling during hulling or transport
- Flavor Impact: Can lead to uneven roasting and bitterness
- Prevention: Gentle processing and sorting equipment
7. Shells and Floater Beans
- Appearance: Hollow or float during water sorting
- Cause: Poor development or insect damage
- Flavor Impact: Muted or hollow cup profile
- Prevention: Floating and density sorting before drying
How to Detect Defects Before Roasting
Experienced roasters and quality control professionals cup small batches of green coffee to assess quality. Here are key methods:
- Visual Sorting
Manually inspect a sample of green beans for obvious defects. - Density Sorting
High-quality beans sink in water; floaters are usually underdeveloped. - UV Light Inspection
Some defects (especially mold or fungus) are easier to spot under ultraviolet light. - Moisture Testing
Beans with too much or too little moisture are prone to quality issues.
The Role of Roasting in Highlighting or Hiding Defects
Roasting can either expose or conceal defects:
- Light roasts tend to reveal more of the bean’s original flavor — both good and bad.
- Dark roasts can sometimes mask subtle defects, but may still retain bitterness or harshness.
Professional roasters often use sample roasting to detect potential problems before committing to a full production roast.
Post-Roast Quality Control
After roasting, defects can still be spotted:
- Color inconsistencies in the batch
- Aromatic flaws (sourness, mustiness, etc.)
- Taste tests (cupping) to detect imbalances
High-end cafés and roasteries often sort beans after roasting, especially for competition-level coffee or limited releases.
What Consumers Should Know
Even if you’re not a roaster or producer, being aware of defects helps you:
- Choose better beans: Specialty roasters usually highlight quality control in their process.
- Improve your brew: If a batch tastes off, visual inspection might reveal defective beans.
- Store wisely: Avoid moisture, oxygen, and heat to prevent quality degradation.
Final Thoughts: Quality Is in the Details
A delicious cup of coffee is the result of countless careful decisions — and avoiding bean defects is one of the most important. From proper cherry selection to careful drying, storage, and roasting, every step matters.
Whether you’re a home brewer or a professional, learning to recognize and eliminate defects will not only improve your coffee but also deepen your appreciation for the complexity behind every single bean.